
Easy Step-By-Step Windows XP Installation
The best way install Windows XP is to do a clean install. It is not difficult to perform a clean installation. Before you perform the installation I recommend that you check Windows XP Compatibility List to ensure that your hardware is supported by XP. If your hardware is not on the compatibility list you can check your hardware manufactures website to download the drivers for Windows XP. Save all the necessary drivers onto floppy disks or CD before you start the installation.
All versions of Windows XP CD are bootable. In order to boot from CD/DVD-ROM you need to set the boot sequence. Look for the boot sequence under your BIOS setup and make sure that the first boot device is set to CD/DVD-ROM. You can then perform the following steps to install Windows XP:
Step 1 - Turn ON your PC and place your Windows XP CD in your CD/DVD-ROM drive. Your PC should automatically detect the CD and you will get a message saying "Press any key to boot from CD". Soon as computer starts booting from the CD your will get the following screen: Press Enter key to start windows installation.

Step 2 - Press F6 if you need to install a SCSI drive BIOS otherwise ignore the message if you are using a IDE, SATA drive.

Step 3 - Press the Enter Key on your keyboard to begin the Windows XP install.

Step 4 - Read over the license and Press F8 on the keyboard to agree to the Windows XP Licensing Agreement.

Step 5 - Pick the hard drive you want to partition and format to install Windows to, and press C Key on keyboard.

Step 6 -
Type the size of the partition you want to make. I recommend having a partition of at least 10 GB or more for Windows since when you install more programs on Windows. It will take up more space. Press Enter key on keyboard.

Step 7 - Press Enter on the drive called C:
Step 8 - Choose format the partition using NTFS file system.This is the recommended file system. If the hard drive has been formatted before then you can choose quick NTFS format. We chose NTFS because it offers many security features, supports larger drive size, and bigger size files.
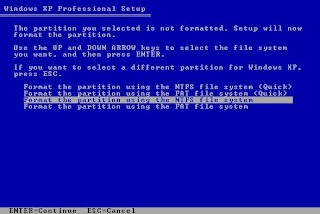
Windows will now start formatting drive C: and start copying setup files as shown on the two images below :

Now Windows start copying setup files as shown on the two images below :
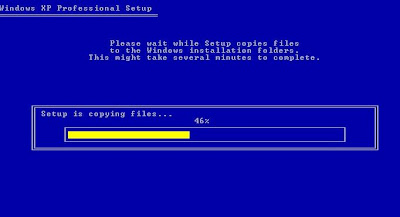
Now Windows start copying setup files as shown on the two images below :

Step 12 - Choose your region and language.

Step 13 - Type in your name and organization.

Step 14. Enter your product key. The product key is Usualy
QW4HD-DQCRG-HM64M-6GJRK-8K83T


Step 22 - Ready to activate Windows? Choose yes if you wish to active Windows over the internet now. Choose no if you want to activate Windows at a later stage.


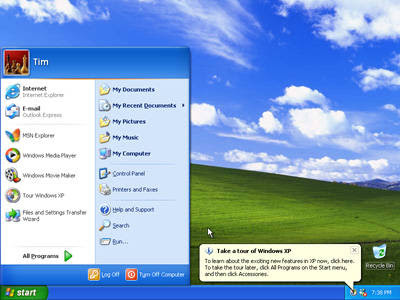
Step 24 - You will get a Thank you screen to confirm setup is complete. Click finish.


If there are any yellow exclamation mark "!" next to any of the listed device, it means that no drivers or incorrect drivers has been loaded for that device. In our case we have a Video Controller (VGA card) which has no drivers installed.
Your hardware should come with manufacturer supplied drivers. You need to install these drivers using the automatic setup program provided by the manufacturer or you need to manually install these drivers. If you do not have the drivers, check the manufacturers website to download them.
To install a driver manually use the following procedure:
(a) From the device manager double click on the device containing the exclamation mark.
(b) This would open a device properties window.
(c) Click on the Driver tab.
(d) Click Update Driver button. The Wizard for updating device driver pops up as shown below:

You now get two options. The first option provides an automatic search for the required driver. The second option allows you to specify the location of the driver. If you don't know the location of the driver choose the automatic search which would find the required driver from the manufacturer supplied CD or Floppy disk. Windows would install the required driver and may ask you to restart the system for the changes to take affect. Use this procedure to install drivers for all the devices that contain an exclamation mark. Windows is completely setup when there are no more exclamation marks in the device manager.


1 comments:
How To Install Windows Xp (Easy Step-By-Step) ~ Computer Tips >>>>> Download Now
>>>>> Download Full
How To Install Windows Xp (Easy Step-By-Step) ~ Computer Tips >>>>> Download LINK
>>>>> Download Now
How To Install Windows Xp (Easy Step-By-Step) ~ Computer Tips >>>>> Download Full
>>>>> Download LINK Ay
Post a Comment